
Motivation and Introduction
As we’re exploring Swift on Server, we wanted to see how that integrates with our authentication solution. Vite has been the hype the past months, so we were eager to try this out as well. We built a small demo project to log in to Auth0, obtain a JSON Web Token (JWT), and use the token to authenticate requests to the Swift API. For the API, we picked Hummingbird as it’s a bit lighter than Vapor.
You can check out the code on GitHub
Let’s get started
Auth0
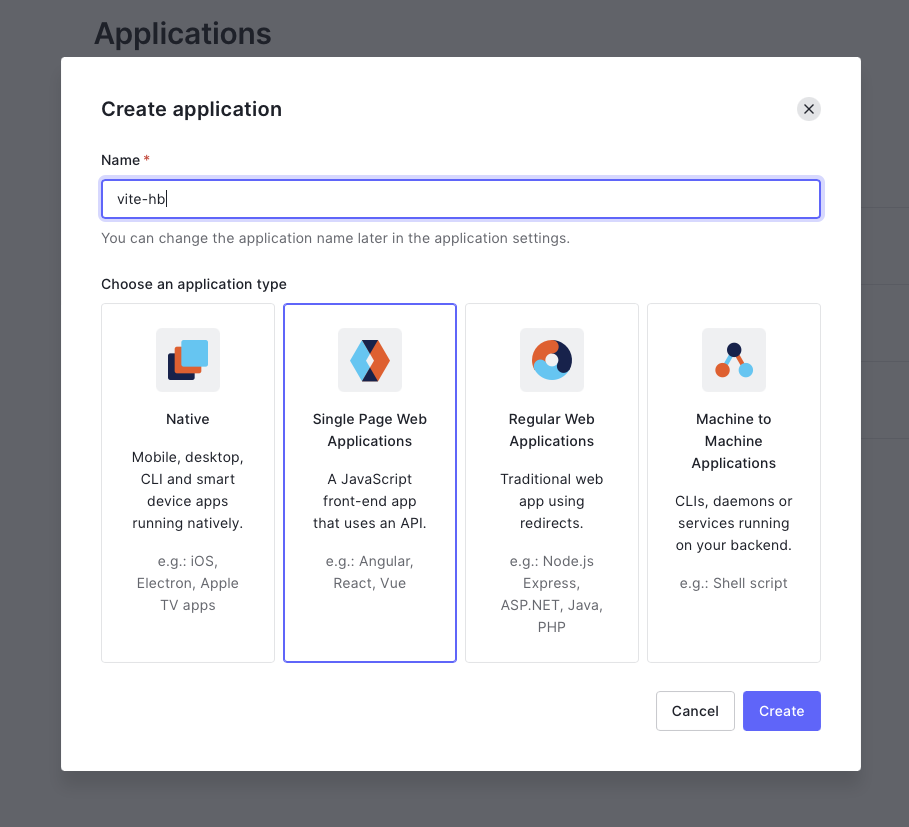
As a first step, let’s create an Auth0 Application and note down the variables. If you haven’t signed up for Auth0 yet, you can do that for free, and then create a “Single Page Application (SPA)” in the Auth0 Dashboard.
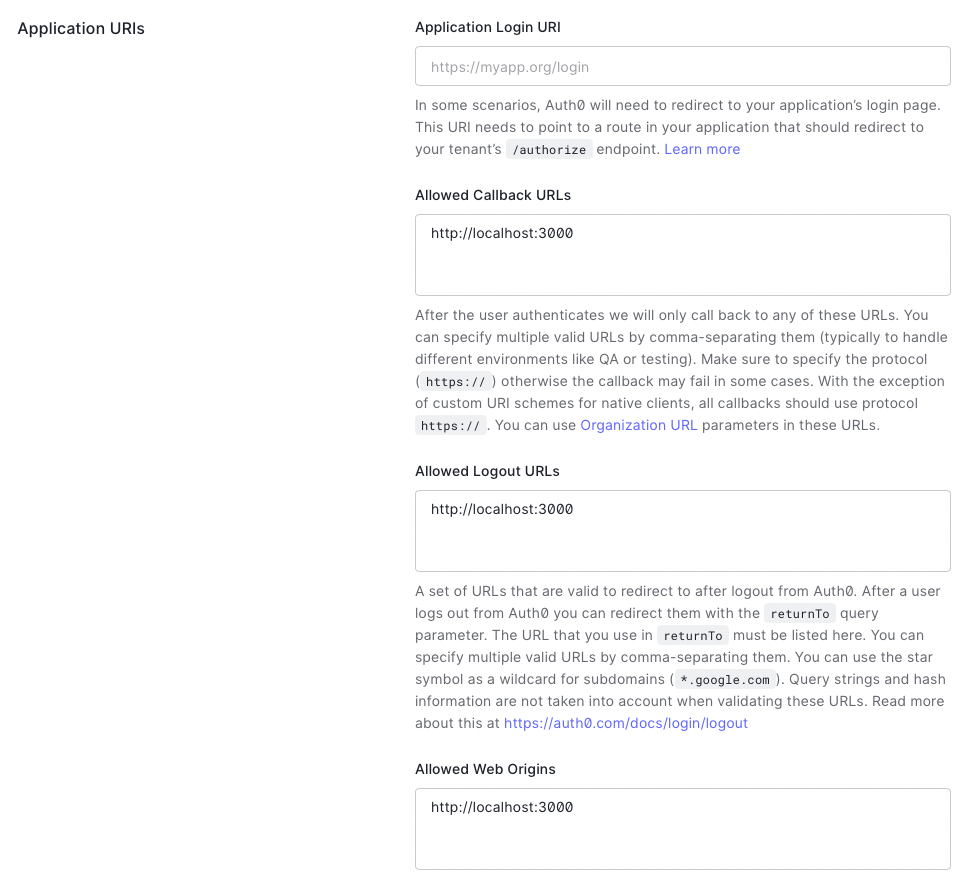
To allow requests from localhost, add http://localhost:3000 to the allowed
callback URLs, web origins and logout URLs. If you deploy this application to a
cloud provider, the URLs need to be added here as well:
For the frontend (React), add these values into the .env file:
VITE_APP_AUTH0_DOMAIN=<app-id>.<region>.auth0.com
VITE_APP_AUTH0_CLIENT_ID=<your-auth0-client-id>
Note: you can find detailled instructions about Auth0 with React in the Quickstart.
For the backend (Hummingbird/Swift), we need the “JSON Web Key Sets” of your application. You can find the endpoint in the Application Settings at the bottom “Advanced Settings” -> “Endpoints”. It should look more or less like this:
.env:
JWKS_URL=https://<app-id>.<region>.auth0.com/.well-known/jwks.jsonAfterwards, go to “Users” and add a test/dev user.
Vite/React/Windi
Vite is the “Next Generation Frontend Tooling” and we wanted to test first-hand what that means. We used an “Opinionated React Template” created by Omar Elhawary as a base, since it’s fairly close to the structure we’re used to from Next.js. This includes React 18, Vite and some other tooling. Instead of Tailwind we use WindiCSS which has great support for Vite:
- Install the package
npm i -D vite-plugin-windicss windicss- Add the
vite.config.jsconfig file:
import WindiCSS from 'vite-plugin-windicss'

export default {
  plugins: [WindiCSS()]
}- Add
windito yourmain.js/ts
import 'virtual:windi.css'For the authentication, we’ll use the Auth0 React SDK:
npm install @auth0/auth0-reactAnd add the Auth0Provider to your main.jsx/tsx:
import 'virtual:windi.css'

import { createRoot, hydrateRoot } from 'react-dom'
import { BrowserRouter } from 'react-router-dom'
import { Auth0Provider } from '@auth0/auth0-react'

import { Routes } from '@/config'

function App(): JSX.Element {
  return (
    <BrowserRouter>
      <Auth0Provider
        domain={import.meta.env.VITE_APP_AUTH0_DOMAIN!}
        clientId={import.meta.env.VITE_APP_AUTH0_CLIENT_ID!}
        redirectUri={
          typeof window !== 'undefined' ? window.location.origin! : ''
        }
      >
        <Routes />
      </Auth0Provider>
    </BrowserRouter>
  )
}

const app = document.querySelector('#app') as Element
const root = createRoot(app)

if (app.hasChildNodes()) hydrateRoot(app, <App />)
else root.render(<App />)
The first page that’s loaded is index.jsx/tsx, so we’ll add the useAuth0
helper to that page and require authentication:
import { useAuth0, withAuthenticationRequired } from '@auth0/auth0-react'

function Home(): JSX.Element {...}

export default withAuthenticationRequired(Home, {
  onRedirecting: () => <div>Redirecting you to the login page...</div>
})
The helper provides several states such as error, isLoading as well as the
user data and logout action:
const { isLoading, getAccessTokenSilently, error, user, logout } = useAuth0()

Hello {user.name}!
To make authenticated requests with a JWT, we’ll use getAccessTokenSilently()
and pass the audience. Prefixed with Bearer, we have a valid authentication
token for our API:
const token = await getAccessTokenSilently({
  audience: `https://${import.meta.env.VITE_APP_AUTH0_DOMAIN}/api/v2/`
})
const response = await fetch(url, {
  mode: 'cors',
  method: 'GET',
  headers: {
    Accept: 'application/json',
    'Content-Type': ' application/json',
    Authorization: `Bearer ${token}`
  }
})
const data = await response.json()
Hummingbird (Swift) API with JWT
In this example we don’t use any unauthenticated requests; all requests to the
API need to have an Authorization header. The easiest way is a simple
Middleware to decode the token:
import Foundation
import Hummingbird
import HummingbirdAuth
import JWTKit

struct JWTPayloadData: JWTPayload, Equatable, HBAuthenticatable {
  enum CodingKeys: String, CodingKey {
    case subject = "sub"
    case expiration = "exp"
  }

  var subject: SubjectClaim
  var expiration: ExpirationClaim
  // Define additional JWT Attributes here

  func verify(using signer: JWTSigner) throws {
    try self.expiration.verifyNotExpired()
  }
}

struct JWTAuthenticator: HBAsyncAuthenticator {
  var jwks: JWKS

  init(jwksUrl: String) throws {
    let jwksData = try Data(
      contentsOf: URL(string: jwksUrl)!
    )
    jwks = try JSONDecoder().decode(JWKS.self, from: jwksData)
  }

  func authenticate(request: HBRequest) async throws -> JWTPayloadData? {
    guard let jwtToken = request.authBearer?.token else { throw HBHTTPError(.unauthorized) }

    let signers = JWTSigners()
    do {
      try signers.use(jwks: jwks)
      let payload = try signers.verify(jwtToken, as: JWTPayloadData.self)
      return payload
    } catch {
      print("couldn't verify token")
      throw HBHTTPError(.unauthorized)
    }
  }
}
Since we’re using two different ports (3000 for the vite client, 8080 for
the hummingbird server), we’ll also need to enable Cross-Origin Resource Sharing
(CORS). You can add both middlewares to your Application+configuration.swift`:
self.middleware.add(
  HBCORSMiddleware(
    allowOrigin: .originBased,
    allowHeaders: ["Accept", "Authorization", "Content-Type", "Origin"],
    allowMethods: [.GET, .OPTIONS]
  ))

let jwtAuthenticator: JWTAuthenticator
guard let jwksUrl = env.get("JWKS_URL") else { preconditionFailure("jwks config missing") }
do {
  jwtAuthenticator = try JWTAuthenticator(jwksUrl: jwksUrl)
} catch {
  print("JWTAuthenticator initialization failed")
  throw error
}
self.middleware.add(jwtAuthenticator)
You can then use the auth0 user id in requests to request user-specific data etc.:
let jwtPayload = request.authGet(JWTPayloadData.self)
let userId = jwtPayload?.subject
Hummingbird does not load .env variables out of the box, so we’ll use a
Makefile to load the environment and build/run the server:
#!make
MAKEFLAGS += --silent
include .env
export $(shell sed 's/=.*//' .env)

start:
	swift run Server

build:
	swift build -c release

install:
	swift package resolve
In the first step, we’ve created the .env file already for the
server, so the JWKS_URL should be available, otherwise make start will throw
an error, as the precondition fails.
Putting it all together
Open two terminal windows and run:
npm run devto start the vite development server on port 3000 and:
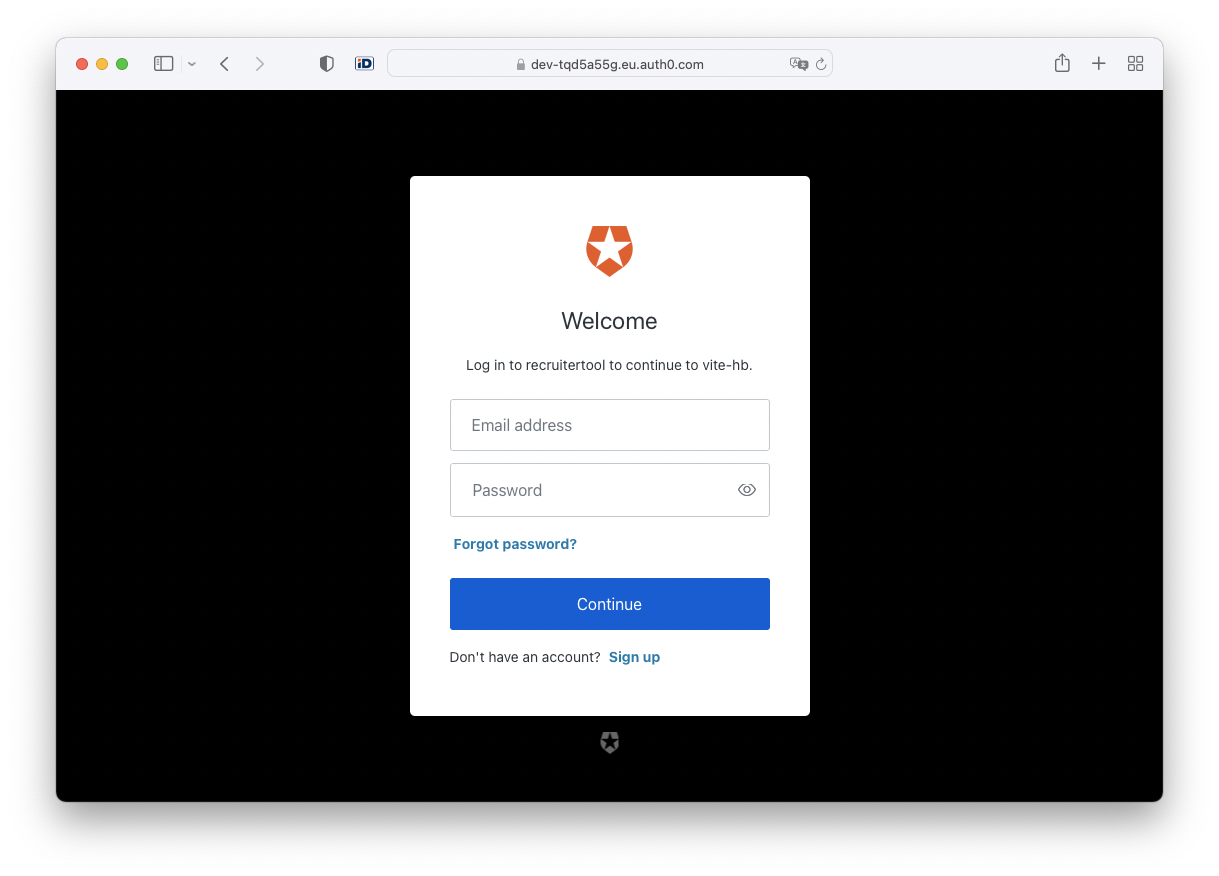
make startto start the swift API on port 8080. Open your browser on
http://localhost:3000 and you should be redirected to an Auth0 login screen:
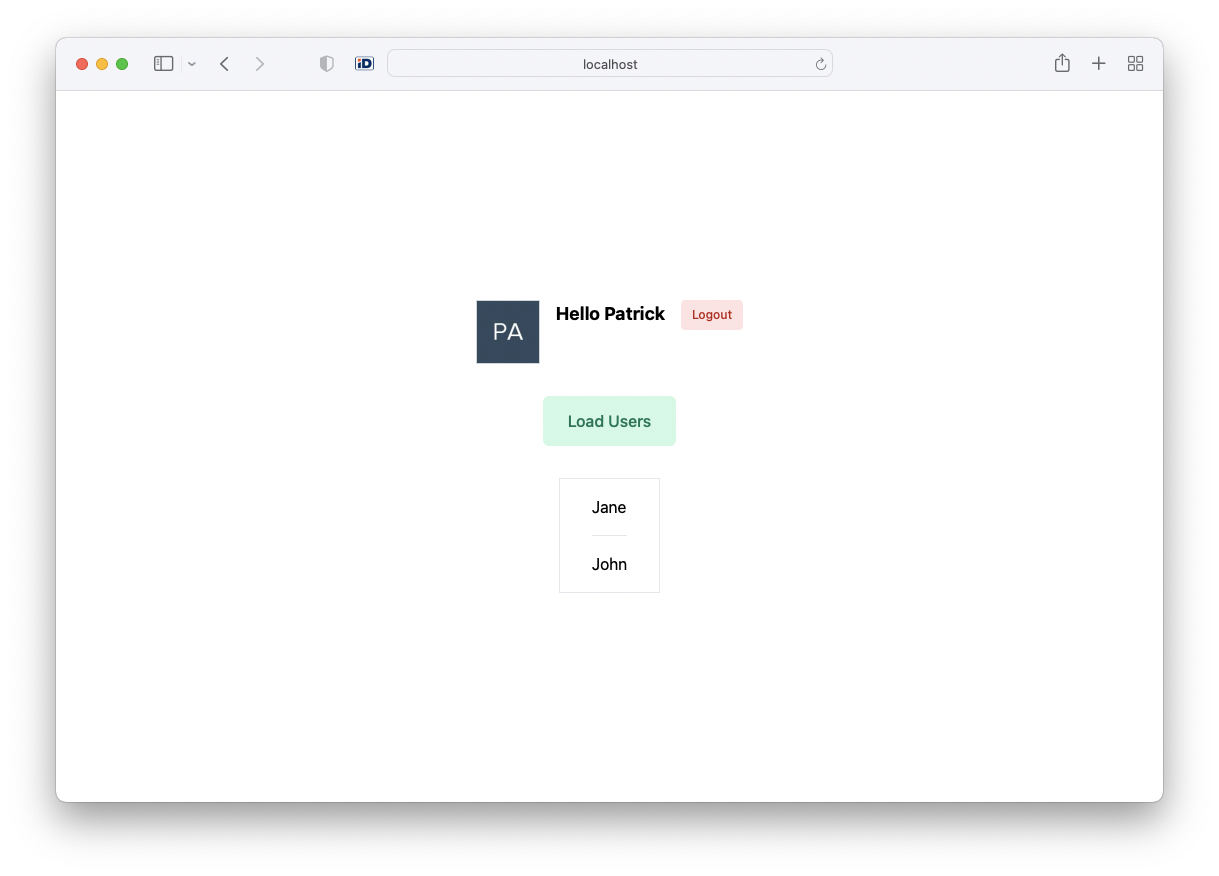
After logging in, you can make an authenticated API request and get some data back:
Summary
As of today, React 18 is still in beta, the initial setup was a bit tricky, but once we finally got it working, it was really pleasent. Especially the Next.js-like routing and pages/components structure made it very easy to transition. Vite is super fast, it’s simply amazing how the Hot Module Replacement (HMR) works. The SPA flow with Auth0 is quick and painless as well, and the Access Tokens are refreshed automatically whenever needed.
Given we’re still getting started with Swift on Server, the authentication middleware for Hummingbird was quite the challenge. We made it work with JWT-Kit which offers a lot of the needed functionality (especially fetching JWKS and RS256 encryption).
The final outcome is a fast, reliable and strictly typed API that can be
deployed on Google Cloud (CGP)
and Amazon Web Services (AWS) and a
Single Page Application (SPA) that can be deployed to a simple Storage bucket
like S3 or Cloud Storage. The API can be used with Cross-Origin headers, or
routed with a load balancer on the same domain (ie. /api). The application
starts with a nice, branded login/signup window and easily integrates with
social providers by just enabling them in the Auth0 console. Auth0 credentials
are stored in a cookie and a JWT access token can be requested on demand when
API requests are made.
Special Thanks
- the contributors of JWT-Kit - https://github.com/vapor/jwt-kit
- Adam Fowler for the Hummingbird Project - https://github.com/hummingbird-project
- Omar Elhawary for https://github.com/oedotme/render
You can find the source code here: Swift API Demo on GitHub. If you have any questions or comments, please reach out on Bluesky or start a discussion on GitHub.
