
Motivation
We’ve been working with Node.js for over 10 years now and decided to pick up a new challenge. For “strong typing” features, people are exploring Rust and Go as alternatives to Node.js with TypeScript. Swift on Server has been around for a few years now, and Swift is an interesting language to learn for mobile development. It feels quite similar to JavaScript with the new async/await features and is easily readable.
There are some interesting http frameworks (think Express.js, Fastify, etc.) to
simplify working with SwiftNIO such as Vapor,
Hummingbird and
Perfect. There’s even a
full CMS (Feather).
The Swift Server Work Group names a few benefits on why Swift is great as a server-side language:
- Small footprint
- Quick startup time
- Deterministic performance
Small footprint: One of the main goals of a modern cloud platform is to maximize resource utilization by efficiently packing services into a single machine. Cloud services built with Swift have a small memory footprint (measured in MB)–especially when compared to other popular server languages with automatic memory management. Services built with Swift are also CPU-efficient, given the language’s focus on performance.
Quick startup time: Swift-based applications start quickly since there are almost no warm up operations. This makes Swift a great fit for cloud services, which are often re-scheduled onto new VMs or containers to address platform formation changes. Using Swift also helps streamline continuous delivery pipelines, since you incur less wait time for new versions of the service fleet to come online. Finally, quick boot times make Swift a perfect fit for serveless applications such as Cloud Functions or Lambda with negligible cold start times.
Deterministic performance: Swift’s use of ARC (instead of tracing garbage collection) and its lack of JIT gives it an important edge in the cloud services space. While tracing garbage collection technologies have vastly improved in the last few years, they still compete with the application for resources which triggers non-deterministic performance. The absence of JIT means no runtime optimization or de-optimization. It’s challenging to debug non-deterministic performance, and language-induced non-deterministic performance can both confuse and mask application-level performance issues that could otherwise be addressed.
Those all sound great, so we wanted to see if we can use modern, Cloud Native tools to build and deploy a Swift Server application. But first we needed to build one. We decided to go with Vapor and PlanetScale, to add some complexity to the regular “Hello World” app.
Install
Swift and Vapor
On macOS, if you have the Developer Tools and Xcode installed, you should be good to go already. You can check if Swift is properly installed:
  » swift --version
swift-driver version: 1.26.9 Apple Swift version 5.5.1 (swiftlang-1300.0.31.4 clang-1300.0.29.6)
Target: arm64-apple-macosx12.0
If you don’t have Swift installed yet, follow the Installing Swift guide for macOS, Linux or Windows. You’ll also need Vapor, which you can easily install with brew:
brew install vaporPlanetScale
Install the PlanetScale CLI. For macOS, via brew:
brew install planetscale/tap/pscale mysql-clientFull PlanetScale CLI reference
Creating your first Swift on Server / Vapor project
This is as simple as npm init:
vapor new swift-api-demoTo go beyond the hello world steps, let’s install Fluent for MySQL and skip Leaf during the project initialization.
cd swift-api-demo
open Package.swift
This will open Xcode and download/install vapor dependencies. You should see the following screen:
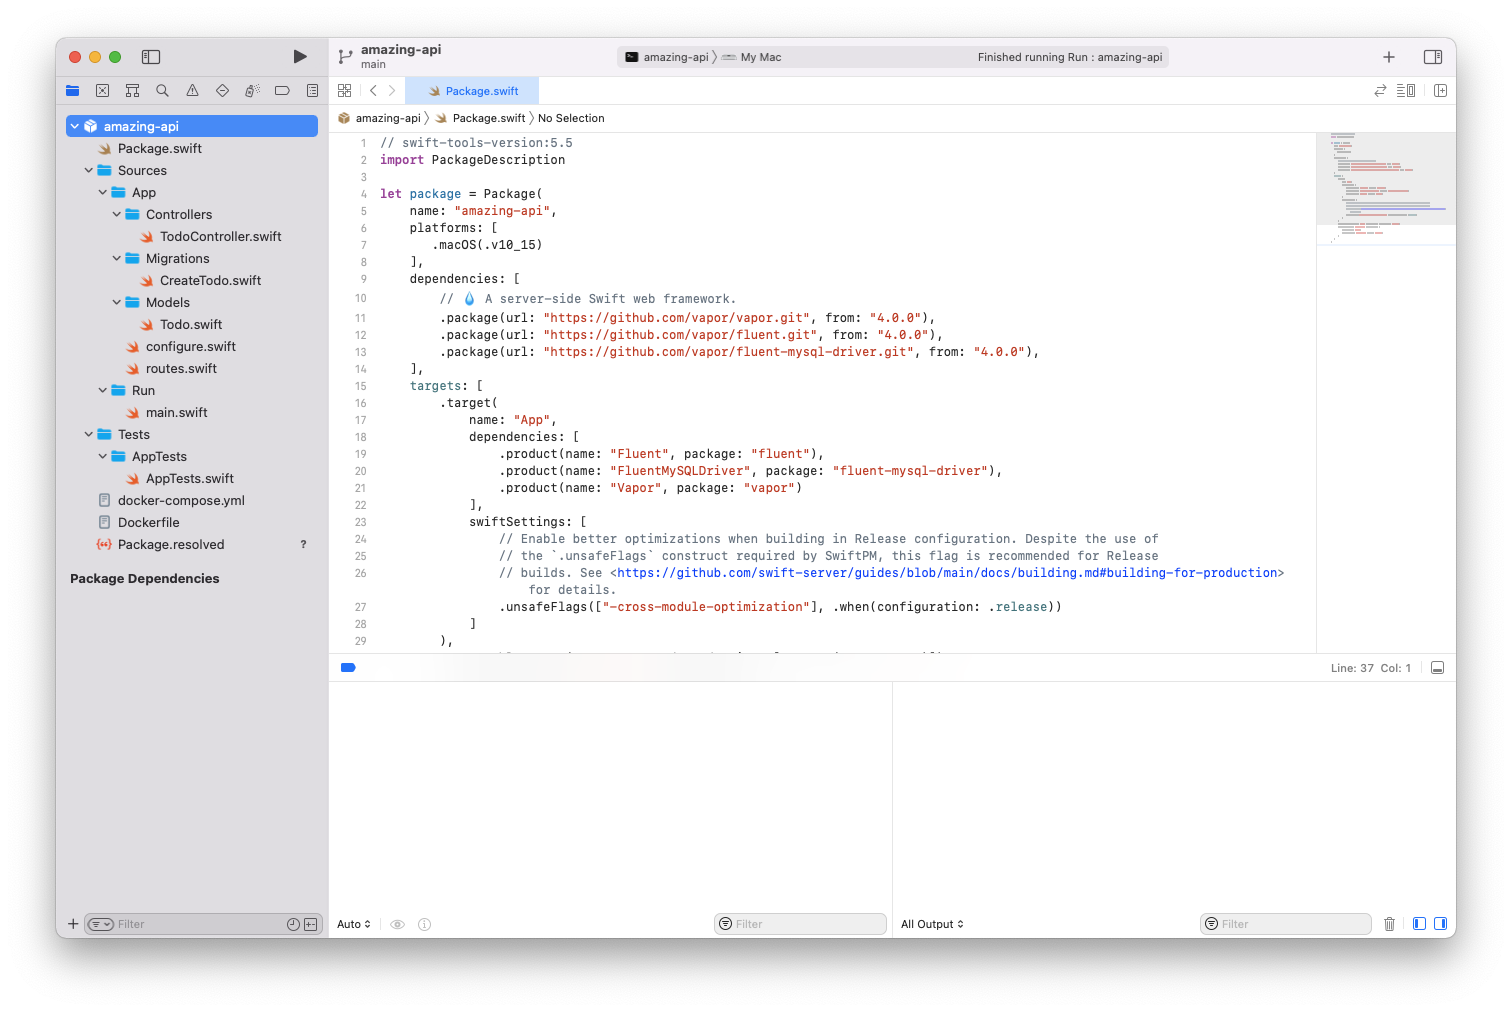
Now simply hit the “Run” button (▶︎, or ⌘R). In the Xcode terminal you should
see a notice that the server has started
([ NOTICE ] Server starting on http://127.0.0.1:8080 ). And voilà, you can
curl your server instance:
» curl localhost:8080 It works!% » curl localhost:8080/hello Hello, world!%
VScode
Instead of XCode, you can also write Swift applications in VSCode. There is a vscode extension available for the language support. We love “auto format on save”, which is a little tricky, but can be achieved by downloading and compiling swift-format:
VERSION=0.50500.0  # replace this with the version you need
git clone https://github.com/apple/swift-format.git
cd swift-format
git checkout "tags/$VERSION"
swift build -c release
ln -s /usr/local/bin/swift-format .build/release/swift-format
The last line will create a symlink in your binaries folder (macOS specific, you
may need to use a different path). Afterwards, format on save should work wth
the
SwiftFormat extension.
Create the PlanetScale Database
After installing the PlanetScale CLI you need to log in, create a database and a password:
    pscale auth login
    pscale database create swift-server-db
    pscale password create swift-server-db main production-password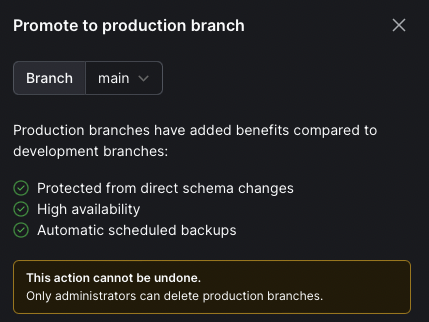
The default database has no “production” branch, which means schema changes can
be applied directly on main. Once you promote your branch to production, you
need to follow a “feature branch flow”, just like in Git:
Create a branch, then open a SQL shell to create a new table:
    pscale branch create swift-server-db todos
    pscale shell swift-server-db todos
We’re creating the table todos with an autogenerated id and a title:
CREATE TABLE `todos` (
  `id` INT AUTO_INCREMENT PRIMARY KEY,
  `title` varchar(1024) NOT NULL,
  `created_at` datetime(6) NOT NULL DEFAULT CURRENT_TIMESTAMP(6),
  `updated_at` datetime(6) NOT NULL DEFAULT CURRENT_TIMESTAMP(6)
) ENGINE=InnoDB DEFAULT CHARSET=utf8mb4 COLLATE=utf8mb4_0900_ai_ci;
exit;
These changes are now in a branch. You can open a Deploy Request and merge it
into main:
pscale deploy-request create swift-server-db todos
pscale deploy-request deploy swift-server-db 1
If you want to use DBeaver or any other MySQL UI, you can
connect to the branch directly with pscale connect <db-name> <branch-name>.
Connecting the Pieces
Identifiers (IDs)
Vapor/Fluent work with UUIDs as default. MySQL doesn’t have native support for
those, so it’s recommended to switch to Integer IDs:
Sources/App/Models/Todo.swift:
import Fluent
import Vapor

final class Todo: Model, Content {
    static let schema = "todos"

    @ID(custom: "id")
    var id: Int?

    @Field(key: "title")
    var title: String

    init() { }

    init(id: Int? = nil, title: String) {
        self.id = id
        self.title = title
    }
}
Vapor with PlanetScale
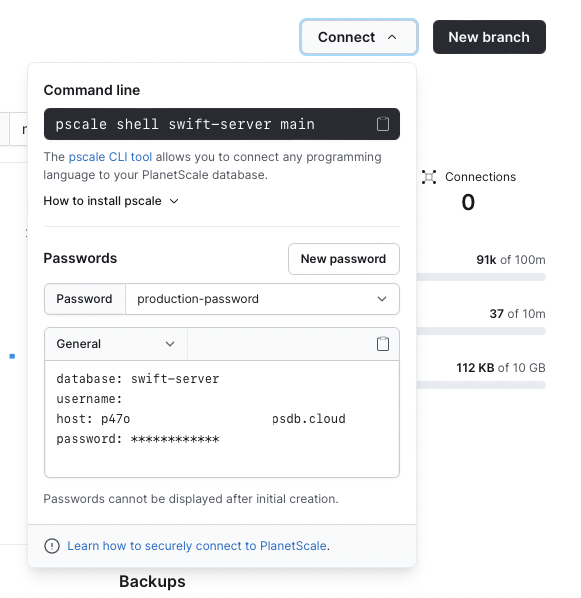
After creating a password on PlanetScale, you should be able to Connect securely to your database. You can find the credentials (host, user, password, db name) on your Dashboard:
Environments are supported and the entire Vapor app can be configured via
environment variables. Vapor supports using different files for different
environments such as .env.production, but we’d recommend to
Store config in the environment instead, and not
in code (except the local .env as the development environment). Cloud
providers usually offer a configuration section for environment variables or
substitutions.
The password is required for a production/staging environment. From the local
development machine it’s recommended to use a tunnel with the pscale CLI.
Run pscale connect <database-name> <branch-name> in a Terminal session and use
127.0.0.1 as your database host. This allows you to switch between branches
and use a visual client to manage the db.
.env
DATABASE_HOST=127.0.0.1
DATABASE_USERNAME=root
DATABASE_PASSWORD=
DATABASE_NAME=swift-server-db
DATABASE_PORT=3306
For the pscale tunnel no password is required. PlanetScale uses SSL/TLS to
connect, so we need to modify the SQL connection by a few lines (Sources ->
Models -> configure.swift):
var tls = TLSConfiguration.makeClientConfiguration()
    tls.trustRoots = .default
    tls.certificateVerification = .noHostnameVerification

    app.databases.use(.mysql(
        hostname: Environment.get("DATABASE_HOST") ?? "localhost",
        port: Environment.get("DATABASE_PORT").flatMap(Int.init(_:)) ?? MySQLConfiguration.ianaPortNumber,
        username: Environment.get("DATABASE_USERNAME") ?? "vapor_username",
        password: Environment.get("DATABASE_PASSWORD") ?? "vapor_password",
        database: Environment.get("DATABASE_NAME") ?? "vapor_database",
        tlsConfiguration: tls
    ), as: .mysql)
We’re adding the TLSConfiguration and set the trustRoots and
certificateVerification. This is specific to PlanetScale and might not be
needed with other database providers. We’re skipping the hostname verification
and setting the root CA to the system root. Keep in mind the ca-certificates
package needs to be installed on Linux.
Once you added the .env file and made the modifications in configure.swift,
you can compile and run the server again. From a Terminal or your favorite API
tool, try to connect and add some data:
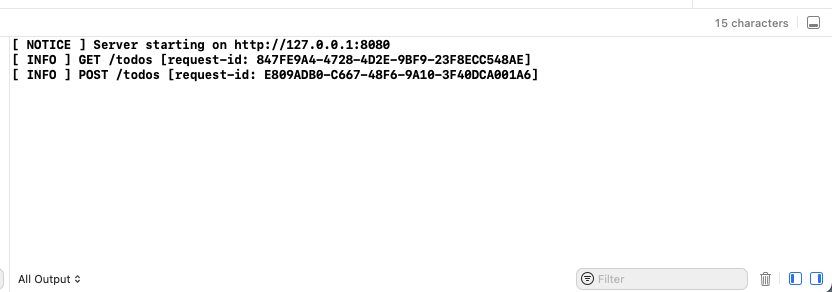
» curl -H "Content-Type: application/json" -XPOST localhost:8080/todos -d '{"title":"hello world"}'
{"title":"hello world","id":1}%
» curl localhost:8080/todos
[{"title":"hello world","id":1}]%
You should see no errors in the server console:
Wrapping it up
Overall we’re pretty excited how things have developed in the Swift on the Server world and how Vapor works. There are some really cool features coming up in Swift 5.6 and everything is under active development. The Vapor Community on Discord is super friendly and helpful!
As a Proof of Concept, we’re able to run a http service and connect to a MySQL database. We can store and retrieve data for a simple todo list. That’s all pretty nice, but it’s still just “localhost” development. We wanted to know how to get this up into the cloud, so we wrote another article on how to deploy your swift api to the cloud. TL;DR: this is pretty simple and we were able to use Cloud Native tooling such as Cloud Build and Cloud Run to automate the entire deployment pipeline from GitHub to Production.
You can find the source code here: Swift API Demo on GitHub. If you have any questions or comments, please reach out on Bluesky or start a discussion on GitHub.
TODO
A few things we need to do some more research on:
- Write tests and implement a TDD workflow
- How can we run Vapor Migrations on PlanetScale?
- How can we use/automate semver tags with XCode?
