
** Update **
A lot has happened since this article was written, so we published an update:
Introduction
The serverless framework is a great tool to bring more structure into the Function as a Service (FaaS) world. I remember trying to deploy a function to Google Cloud a few months ago, and without serverless and it was a pain, I gave up. Now it’s as easy as installing the framework, get credentials and deploy the function, done. There were a few hick-ups here and there and I hope serverless will address those, not just their AWS support.
Coming from a service-oriented container world, the first thing we wanted to do is automate our deployment and that was already harder than expected, even with serverless. Second, we want to have semantic version numbers for maintainability and to keep track of changes and compatibility.
Since we couldn’t find a complete guide on how to make this work, we decided to put the information together here.
Requirements:
- Repository on GitHub
- Travis Pro subscription for private repos, free for public
- Google Cloud account (you need “Owner” permissions on the project!)
The first step is to set up the serverless repository, following the Quick Start Guide
npm install -g serverless
serverless create --template google-nodejs --path my-service
cd my-service && npm install
Get your credentials from Google
following these instructions
and instead of putting them in ~/.gcloud/keystore.json copy the keystore
directly in the working repository. Don’t worry, it’s already on .gitignore
and won’t be commited. Update serverless.yml accordingly. We’ll just add some
default packages:
npm install standard tap semantic-release --save-devTravis CI
This is already a working HelloWorld-App, so we’ll leave it there and continue
on deployment. Next step is Travis CI. For that we need
a valid test that can be executed, so we create /test/bogus.js :
const test = require('tap').test

test('bogus', (assert) => {
  assert.equal(true, true, 'bogus')
  assert.end()
})
Here’s a complete example for the package.json including scripts for travis to run tests:
With this package.json you can connect Travis with the repository, commit a simple change and verify everything works correctly. The test should be green.
Semantic-Release
If you don’t know Semantic-Release, checkout the readme and documentation. In short: semantic-release automatically increases the version number based on your recent changes/commits. The easiest way to set this up is the CLI
npm install -g semantic-release-cli
semantic-release-cli setup
A few important things to follow:
- the
repositoryattribute in your package.json must match the repo - you need Admin permissions on GitHub for that repo
- the npm module name is available / the organisation is registered and you have permissions to create a new module
Once the setup is complete, you will have a .travis.yml file that has all the
steps required for semantic-release. Make a small change on the code and push a
fix: testing semrel commit.
Travis should now create a new minor version number for you.
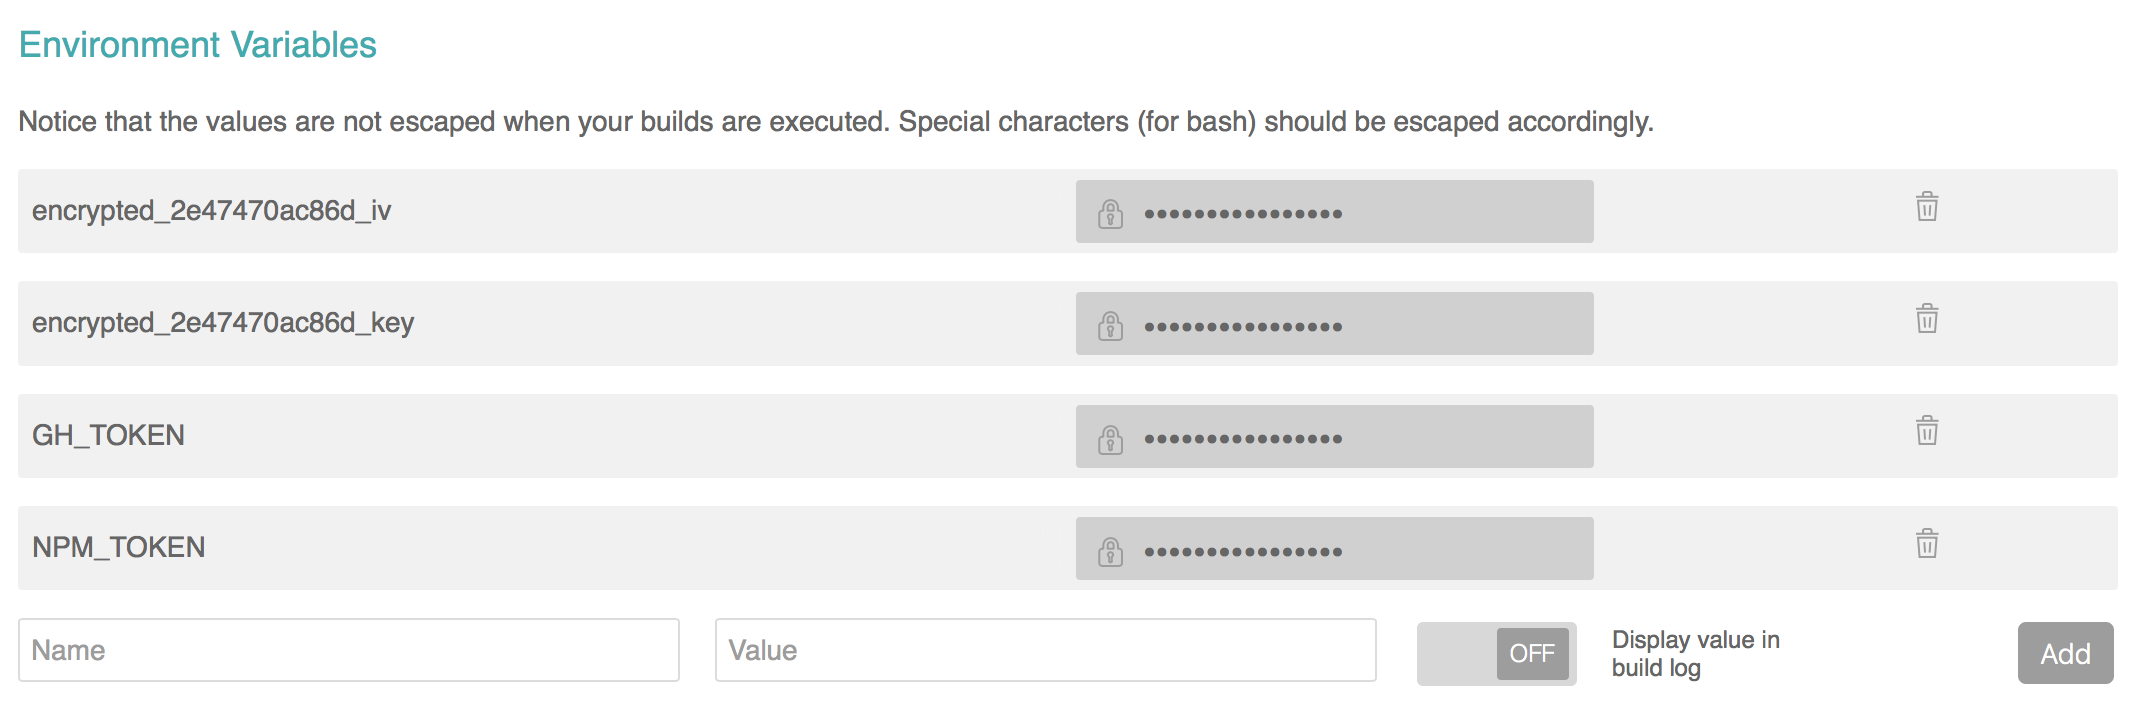
semantic-release-cli works great if you set up a single repo. If you want to
set up multiple repos at once, we’d advice to go to GitHub and NPM and get API
tokens manually. Store them somewhere safe and add GH_TOKEN and NPM_TOKEN on
the travis settings for each repo. That’s all semantic-release needs to work.
Make sure both tokens have publish permissions and access rights on the
repositories you want to deploy.
Google Cloud Functions Deployment
In order to deploy anything to Google Cloud, Travis needs your keyfile. Here’s why we need that in the project folder and not somewhere hidden in the home folder.
First, install the travis command line tool. On macOS that’s simply done with
brew install travis and since it’s not a node module, this will take a little
while. Once installed, log in to your travis account: travis login.
While in the project folder, run:
travis encrypt-file keyfile.json --addThis will
encrypt the keyfile and add
it to the travis.yml config. If you open the file, there should be a
before_install section with a openssl aes-256-cbc.... command, this will
make the keyfile available to travis. Here’s the complete file:
If you have set the right permissions on Google Cloud, this *should *automatically deploy your master branch to Google Cloud Functions, if the tests work. The same time, you get a new release on GitHub.
Verify in the Travis settings the encyrption keys are stored there as well as
the GH_TOKEN and NPM_TOKEN:
You can now experiment for example with build stages etc. to further improve the setup of deployment pipeline.
Enjoy your new deployment pipeline to Google Functions without “Hauptversionsnummernerhöhungsangst” ( — Stephan Bönnemann).
Here’s a complete repo and the travis tests with all details
Next steps
- instead of deploying the master branch, we’re looking into deploying a specific tag
- how to promote tags from staging to production
If you have any questions or comments, please reach out on Bluesky or start a discussion on GitHub.
